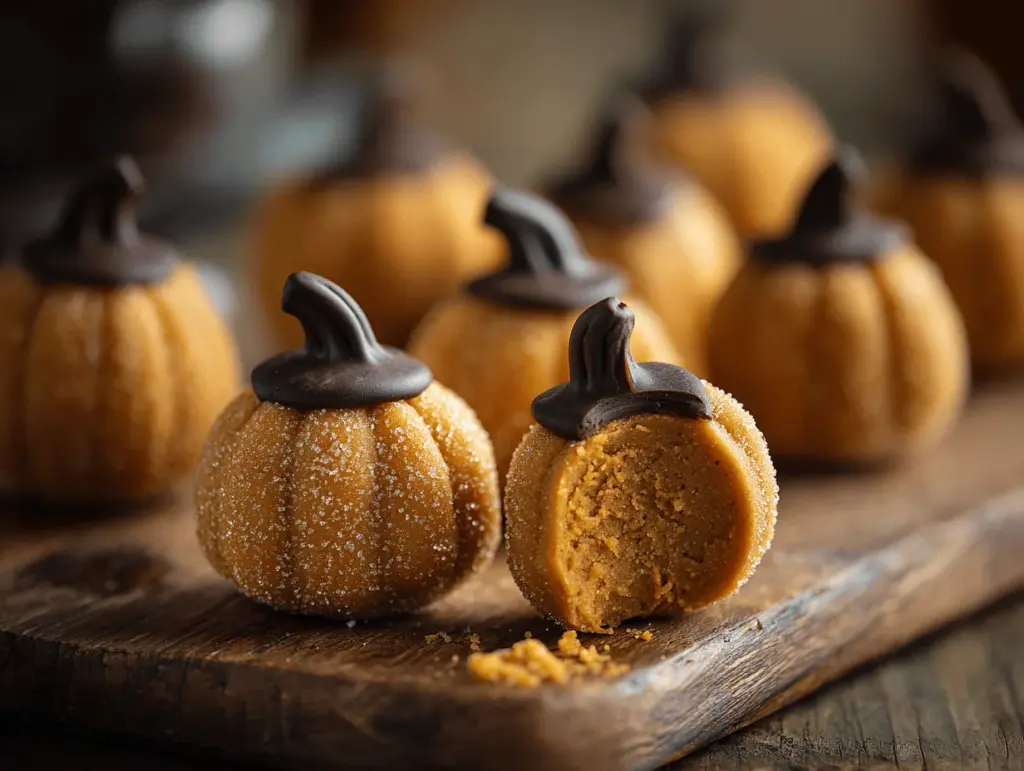
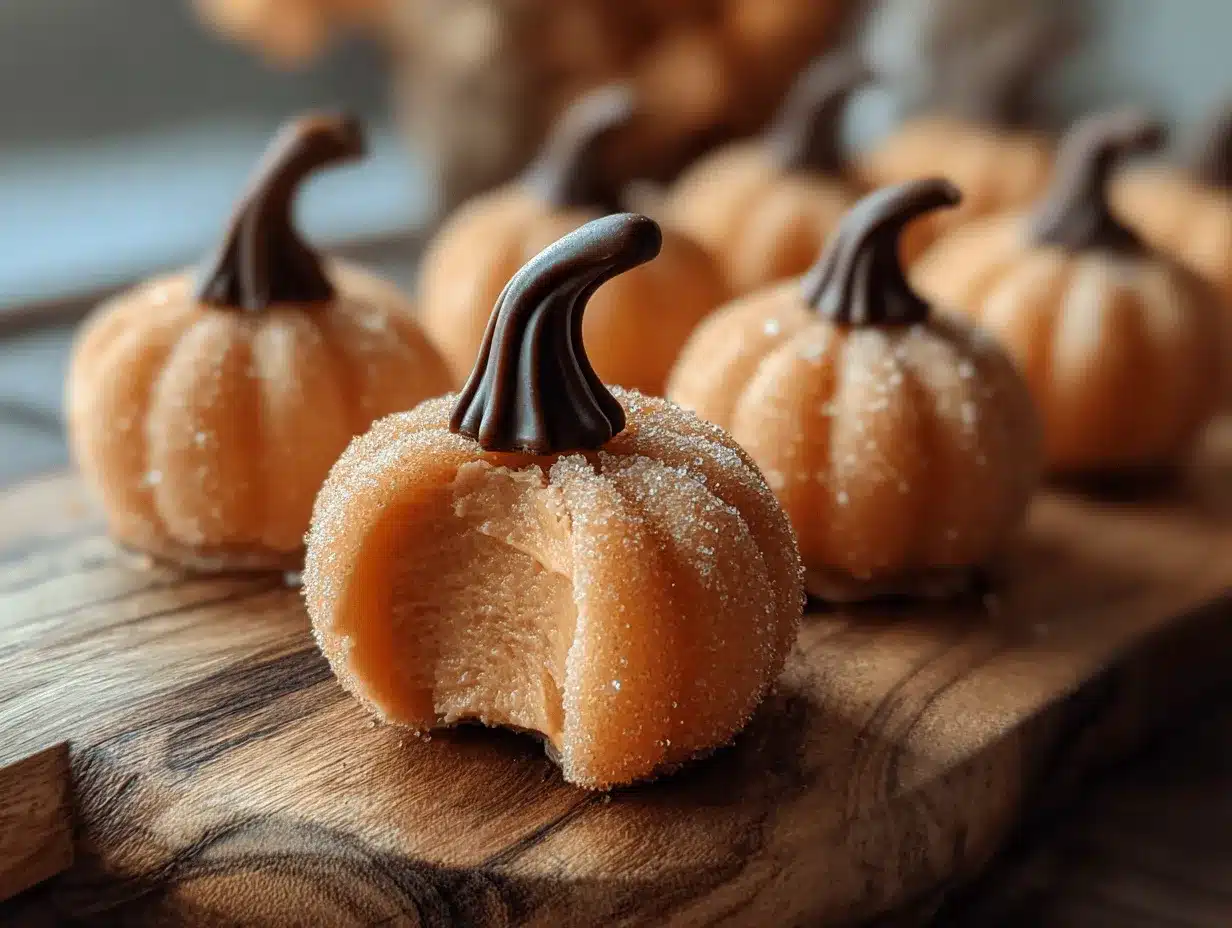
The first bite of a pumpkin cheesecake truffle is a little moment of autumn magic—creamy, spiced, and wrapped in a glossy chocolate shell that cracks just so. I still remember the first time I made these Pumpkin Cheesecake Truffles. My kitchen smelled like cinnamon and nutmeg, and honestly, I couldn’t keep my hands off the mixing bowl. You know it’s a keeper when you’re swiping the last bits of filling with your finger (don’t judge, we’ve all been there!).
This recipe for pumpkin cheesecake truffles is one I’ve tested over and over, tweaking the spice blend and playing with chocolate coatings until I landed on the perfect balance of rich, tangy, and sweet. If you love those little bites of fall flavor—think pumpkin pie meets cheesecake, all snuggled up in chocolate—these are about to become your new favorite treat. I’ve brought them to Halloween parties, Friendsgiving, and even tucked them into little gift boxes for neighbors. They go fast! And the best part? You don’t need to be a pastry chef to pull them off. Just a little patience, a few pantry staples, and a love for autumn flavors.
So, whether you’re looking for a cozy project to do on a rainy day or a show-stopping dessert for your next fall gathering, these pumpkin cheesecake truffles are the answer. Trust me: creamy pumpkin, tangy cream cheese, a whisper of spice, and that chocolate shell—this is the kind of recipe that turns heads and brings people back for seconds. Let’s get rolling (literally) and make your kitchen smell like the best of autumn!
Why You’ll Love This Recipe
I’ve made batch after batch of these pumpkin cheesecake truffles, and there’s a reason they’ve become a fall tradition in my house. Here’s why you (and everyone you share them with) will love them:
- Quick & Easy: You don’t need an oven or fancy gadgets—just a bowl, a mixer, and a little fridge time. Perfect for when you want a homemade treat without a big fuss.
- Simple Ingredients: Everything here is easy to find—pumpkin puree, cream cheese, white chocolate, a few spices. No wild goose chases at the grocery store!
- Perfect for Autumn Celebrations: These are made for sharing at Halloween parties, Thanksgiving dessert tables, or cozy movie nights at home.
- Crowd-Pleaser: Every time I serve these, someone asks for the recipe. Kids and adults both go wild for them (and they’re bite-sized, so you can sneak a few without guilt).
- Unbelievably Delicious: The filling is creamy, a little tangy, perfectly spiced, and the chocolate shell melts in your mouth. It’s the best of cheesecake and pumpkin pie, all in one bite.
What makes this pumpkin cheesecake truffles recipe stand out? For starters, I blend the pumpkin and cream cheese until silky smooth, so there’s no graininess—just pure, dreamy texture. The spice blend strikes a cozy balance (not too strong, not too bland), and rolling them by hand means every truffle is packed with love. I also dip them in both white and dark chocolate for a beautiful, Pinterest-worthy finish. And if you’ve ever worried about homemade truffles being tricky or fussy, don’t. I’ve got step-by-step tips (including how to keep your chocolate shell shiny and your filling just the right consistency).
Honestly, these pumpkin cheesecake truffles are the dessert I crave when sweater weather hits. They’re comforting, a little nostalgic, and always gone before you know it. If you want to wow your friends—or just treat yourself to something special—this is the recipe for you.
Ingredients Needed
This recipe uses simple, wholesome ingredients you probably already have in your pantry or fridge. Each one brings a little something special to these pumpkin cheesecake truffles, from creamy tang to autumn spice and a pop of chocolate crunch.
- Cream cheese, softened (full-fat gives the richest flavor, but light works too)
- Pumpkin puree (not pumpkin pie filling—plain canned pumpkin is best)
- Powdered sugar (for sweetness and smooth texture)
- Graham cracker crumbs (adds a hint of “crust” flavor; swap with gluten-free cookies if needed)
- White chocolate chips or bars, chopped (for the truffle base and the coating—use a trusted brand like Ghirardelli for best results)
- Vanilla extract (real vanilla makes a difference—if you can, splurge a little here)
- Pumpkin pie spice (a mix of cinnamon, nutmeg, ginger, and cloves; adjust to taste)
- Salt (just a pinch to balance the sweetness—don’t skip it!)
- Optional: Dark chocolate chips or candy melts (for a two-tone shell or drizzle)
- Optional: Sprinkles, chopped nuts, or more graham cracker crumbs (for topping—let your creativity run wild)
Ingredient notes and swaps:
- Cream cheese: If you’re dairy-free, use a plant-based cream cheese (I’ve tried Miyoko’s, which works great).
- Pumpkin puree: Homemade puree is wonderful if you’ve got it, but canned is honestly just as good here.
- White chocolate: If you prefer milk or dark chocolate, feel free to coat the truffles in those instead—or do a mix for extra fun.
- Graham crackers: For gluten-free, swap in GF graham crackers or vanilla wafers. For a nutty spin, try ground pecans or almond flour.
All of these ingredients are easy to find, and many are pantry staples (especially during pumpkin season). I always keep an extra can of pumpkin and a block of cream cheese on hand this time of year—just in case the craving strikes. And don’t be afraid to play around with toppings. The more festive, the better!
Equipment Needed
- Mixing bowls (at least one large for the filling and one small for the chocolate)
- Hand mixer or stand mixer (makes blending smooth and easy; a sturdy whisk and elbow grease works in a pinch)
- Baking sheet (lined with parchment or wax paper for chilling and setting)
- Microwave-safe bowl (for melting chocolate; a double boiler works too if you prefer)
- Cookie scoop or small spoon (helps portion truffles evenly—though I’ve shaped dozens by hand and they’re just as cute!)
- Fork or dipping tool (for coating the truffles in chocolate)
- Refrigerator space (you’ll need a spot to chill the truffles as they set)
If you don’t have a mixer, just make sure your cream cheese is really soft—it’ll mix up fine with a spatula or sturdy whisk. I’ve even used my hands to shape the truffles (messy but fun!). For melting chocolate, the microwave is quick (just go slow and stir often), but if you’re a traditionalist, a double boiler gives you more control. Honestly, you don’t need anything fancy—just a little counter space and a sense of adventure.
Maintenance tip: If you use a hand mixer, wipe down the beaters right away before the filling dries (trust me, it’s a pain to clean later!). And if you’re new to dipping chocolates, use a fork for easy drizzling and draining. Budget-friendly pro tip: I grab parchment paper at the dollar store—it works just as well as the pricier rolls.
Preparation Method
- Prepare the filling:
In a large mixing bowl, combine 8 ounces (225g) of softened cream cheese with 1/2 cup (120g) pumpkin puree. Beat with a hand mixer (or stand mixer) on medium speed until smooth and fluffy, about 2 minutes. Scrape down the bowl as needed. You want zero lumps—if your cream cheese is still cold, let it sit for a few more minutes. - Add the flavor:
Mix in 1 teaspoon vanilla extract, 1 teaspoon pumpkin pie spice, and a generous pinch of salt. Blend until incorporated. Taste and adjust the spice if you like it bolder (I sometimes add an extra 1/4 teaspoon cinnamon). - Sweeten and thicken:
Add 1 1/4 cups (140g) powdered sugar and 1/2 cup (50g) graham cracker crumbs. Beat on low speed until a thick, slightly sticky dough forms. If the mixture looks too soft to shape, add another tablespoon or two of graham crumbs. It should be thick, but not dry. - Melt the chocolate for the base:
In a microwave-safe bowl, melt 1/2 cup (85g) white chocolate chips in 20-second bursts, stirring after each. Once melted and smooth, fold into the pumpkin mixture. This helps the truffles set up firm and creamy. - Chill the filling:
Cover the bowl with plastic wrap and refrigerate for at least 1 hour (or freeze for 30 minutes if you’re in a hurry). The colder the filling, the easier it is to roll. - Shape the truffles:
Line a baking sheet with parchment paper. Scoop out heaping teaspoons (about 1 tablespoon/15g each) of filling and roll into balls. Place on the sheet. You should get about 24 truffles. If your hands get sticky, dust them with a little powdered sugar. - Freeze for dipping:
Pop the tray into the freezer for 15-20 minutes. This keeps the truffles firm and helps the chocolate set quickly. - Coat in chocolate:
Melt 1 1/2 cups (255g) white chocolate chips (or dark chocolate, if you prefer) in a clean bowl. Using a fork, dip each truffle, letting excess chocolate drip off. Place back on the parchment. If you want a two-tone look, drizzle with melted dark chocolate. - Add toppings:
While the chocolate is wet, sprinkle with graham cracker crumbs, autumn sprinkles, or chopped nuts. Work quickly—the chocolate sets fast! - Let set and enjoy:
Chill the coated truffles in the fridge for 30 minutes, or until the shells are firm. Transfer to an airtight container and store chilled.
Troubleshooting tips:
If your filling is too soft to roll, add more graham crumbs or chill longer. If your chocolate seizes (gets clumpy), add a teaspoon of coconut oil and stir gently. I’ve had days where the truffles looked a little wonky—just cover them with extra sprinkles! They’ll taste great, promise.
Cooking Tips & Techniques
Here’s where the magic happens—these little tricks will make your pumpkin cheesecake truffles look as good as they taste:
- Room Temperature Cream Cheese: Cold cream cheese turns lumpy. Give it 30 minutes on the counter for the smoothest filling.
- Chill for Easy Rolling: Don’t rush the chilling step—soft filling makes a mess. If you’re short on time, use the freezer for 20-30 minutes.
- Melt Chocolate Slowly: White chocolate scorches fast! Microwave in short bursts and stir after each time. If using a double boiler, keep water at a simmer, not a boil.
- Use a Fork for Dipping: A fork lets extra chocolate drip off, so you don’t get a huge puddle at the base. Set each truffle gently on parchment to avoid smudges.
- Batch Work: Only take out a few truffles at a time from the freezer when dipping—if they warm up, they’ll fall apart in the chocolate.
- Decorate Fast: Have toppings ready before you start dipping. The chocolate sets quickly (especially in a cool kitchen), so sprinkle right after dipping.
Common mistakes? Oh, I’ve made them. Once, I tried to skip chilling and wound up with sticky, shapeless blobs (still tasty, but not cute). I’ve overheated chocolate and ended up with a lumpy mess—if that happens, stir in a bit of coconut oil to smooth it out. And if your truffles crack after chilling, let them sit at room temp for 5 minutes before serving. They’ll be perfect for Instagram (or just for eating by the handful).
Pro tip: If you want super-smooth truffles, blend the filling in a food processor. It’s a little extra work, but the texture is amazing. And for multitasking? Melt chocolate while the truffles chill—it saves you time and keeps you from sneaking too many bites of the filling (not that I’m judging).
Variations & Adaptations
One of the best parts about pumpkin cheesecake truffles? You can make them your own. Here are some creative spins I’ve tried (and loved):
- Gluten-Free Version: Swap graham cracker crumbs for gluten-free cookies or almond flour. I’ve used gluten-free gingersnaps for a spicy kick—so good.
- Vegan/Dairy-Free: Use plant-based cream cheese and dairy-free white chocolate chips. Miyoko’s and Enjoy Life are my go-tos. Double-check your toppings for hidden dairy!
- Spiced Chocolate Shell: Stir a pinch of pumpkin pie spice or cinnamon into melted chocolate before coating. It adds an extra layer of autumn flavor.
- Change Up the Toppings: Try mini chocolate chips, toasted coconut, crushed pecans, or even edible gold dust for a little sparkle.
- Nut-Free Option: Skip nut toppings and use allergy-friendly chocolate. The truffles themselves are nut-free as written.
For a fun twist, I sometimes dip half the batch in dark chocolate and half in white, then swirl the tops with a toothpick for a marbled look. If you want to get really fancy, shape the truffles into small pumpkins and use a green M&M or sprinkle as a “stem.” Kids think it’s adorable—and so do I!
Serving & Storage Suggestions
These pumpkin cheesecake truffles taste best cold or at cool room temperature—think creamy, melt-in-your-mouth perfection. I love serving them on a pretty fall platter, maybe with a dusting of extra graham crumbs or a drizzle of dark chocolate for drama.
They pair beautifully with hot apple cider, chai lattes, or a glass of milk (for the kiddos). If you’re setting them out for a party, keep them on a chilled plate or only bring out a few at a time—they can get soft if left out for hours.
Storing:
Pop the truffles in an airtight container and keep in the fridge for up to 5 days. They actually taste even better on day two when the flavors meld. For longer storage, freeze in a single layer, then transfer to a zip-top bag. Thaw in the fridge overnight before serving. If the chocolate shells get a little condensation, just dab gently with a paper towel—it won’t hurt the flavor.
When reheating (if you want a softer bite), let sit at room temp for 20 minutes. I don’t recommend microwaving—they’ll melt into a puddle (been there, done that). These make great gifts, too—just place in mini cupcake liners and tuck into a cute box!
Nutritional Information & Benefits
Each pumpkin cheesecake truffle (assuming 24 per batch) is approximately:
- Calories: 110
- Fat: 6g
- Carbohydrates: 13g
- Protein: 1g
- Sugar: 11g
Health perks: Pumpkin is loaded with vitamin A and fiber, and you get a little calcium from the cream cheese. They’re naturally portion-controlled, so you can enjoy a sweet treat without going overboard. If you use gluten-free or dairy-free swaps, they work for a variety of diets (just double-check your chocolate for allergens). And hey, a little chocolate now and then is good for the soul—at least, that’s my philosophy!
Conclusion
There’s something downright magical about these pumpkin cheesecake truffles—they’re easy, adorable, and packed with fall flavor. Whether you’re making them for a party, a gift, or just to treat yourself, they never disappoint. I love how customizable they are, and honestly, rolling and dipping can be a fun family project (just expect some messy fingers!).
If you’re craving a little autumn joy, give this pumpkin cheesecake truffles recipe a try. Don’t be afraid to tweak the spices, change up the chocolate, or go wild with toppings—the best recipes are the ones you make your own. I hope these become a cozy, sweet tradition in your kitchen, just like they have in mine.
If you make these, drop a comment below or tag me on Pinterest and let me know how they turned out! I’d love to see your creative spins and hear your tips. Happy fall baking—may your truffles be cute, creamy, and oh-so-delicious!
Frequently Asked Questions
Can I use homemade pumpkin puree instead of canned?
Yes, absolutely! Just make sure your homemade puree isn’t too watery—if it is, blot with paper towels before adding. It can add a lovely fresh flavor to your pumpkin cheesecake truffles.
How do I prevent the truffles from getting too soft for dipping?
Chill or freeze the rolled truffles for 15-30 minutes before coating in chocolate. If they start to soften as you work, pop them back in the freezer for a few minutes.
Are these pumpkin cheesecake truffles gluten-free?
The base recipe uses graham cracker crumbs, which contain gluten. You can easily substitute gluten-free graham crackers or cookies for a gluten-free version!
What’s the best way to melt chocolate without burning it?
Melt chocolate in the microwave in 20-second bursts, stirring after each. Or use a double boiler over low heat. White chocolate burns quickly, so go slow and stir often.
Can I make these ahead of time for a party?
Yes! These pumpkin cheesecake truffles are actually better when made a day ahead. Store in the fridge and bring out just before serving for the best texture and flavor.
Pin This Recipe!
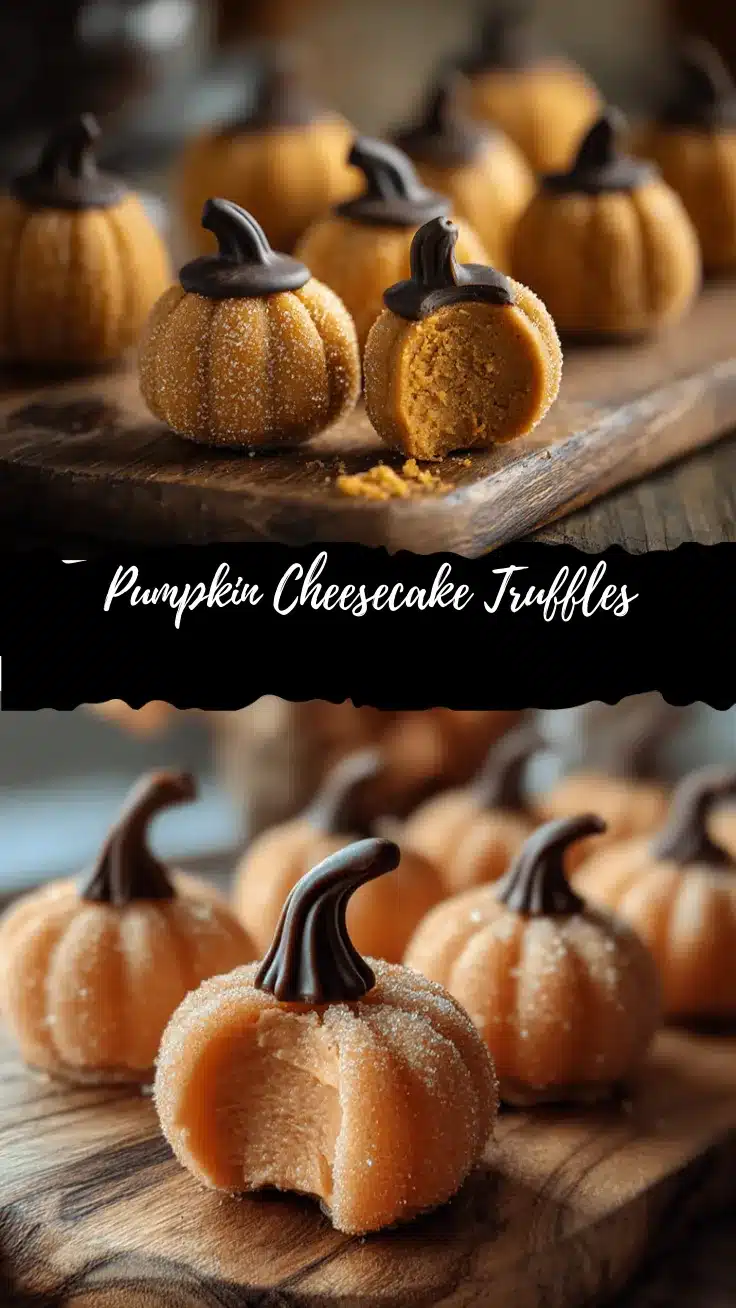
Pumpkin Cheesecake Truffles
- Total Time: 1 hour 30 minutes
- Yield: 24 truffles 1x
Description
These Pumpkin Cheesecake Truffles are creamy, spiced, and wrapped in a glossy chocolate shell—like pumpkin pie meets cheesecake in a bite-sized treat. Easy to make and perfect for fall gatherings, gifts, or cozy nights in.
Ingredients
- 8 ounces (225g) cream cheese, softened (full-fat or light)
- 1/2 cup (120g) pumpkin puree (not pumpkin pie filling)
- 1 1/4 cups (140g) powdered sugar
- 1/2 cup (50g) graham cracker crumbs (or gluten-free cookies for GF option)
- 1/2 cup (85g) white chocolate chips or chopped white chocolate (for filling)
- 1 1/2 cups (255g) white chocolate chips or dark chocolate chips/candy melts (for coating)
- 1 teaspoon vanilla extract
- 1 teaspoon pumpkin pie spice
- Pinch of salt
- Optional: Dark chocolate chips or candy melts (for drizzle)
- Optional: Sprinkles, chopped nuts, or more graham cracker crumbs (for topping)
Instructions
- In a large mixing bowl, combine softened cream cheese and pumpkin puree. Beat with a hand mixer on medium speed until smooth and fluffy, about 2 minutes.
- Mix in vanilla extract, pumpkin pie spice, and a pinch of salt. Blend until incorporated. Taste and adjust spice if desired.
- Add powdered sugar and graham cracker crumbs. Beat on low speed until a thick, slightly sticky dough forms. If too soft, add more graham crumbs.
- In a microwave-safe bowl, melt 1/2 cup white chocolate chips in 20-second bursts, stirring after each. Fold melted chocolate into the pumpkin mixture.
- Cover the bowl and refrigerate for at least 1 hour (or freeze for 30 minutes) until the filling is firm.
- Line a baking sheet with parchment paper. Scoop out heaping teaspoons (about 1 tablespoon each) of filling and roll into balls. Place on the sheet (about 24 truffles).
- Freeze the tray of truffles for 15-20 minutes to firm up for dipping.
- Melt 1 1/2 cups white chocolate chips (or dark chocolate) in a clean bowl. Using a fork, dip each truffle, letting excess chocolate drip off. Place back on parchment.
- If desired, drizzle with melted dark chocolate for a two-tone look.
- While chocolate is wet, sprinkle with graham cracker crumbs, sprinkles, or chopped nuts.
- Chill coated truffles in the fridge for 30 minutes, or until shells are firm. Store in an airtight container in the fridge.
Notes
For gluten-free truffles, use gluten-free graham crackers or cookies. For vegan/dairy-free, use plant-based cream cheese and dairy-free chocolate. Chill the filling thoroughly for easy rolling. If chocolate seizes, add a teaspoon of coconut oil and stir gently. Decorate quickly after dipping, as chocolate sets fast.
- Prep Time: 25 minutes
- Cook Time: 0 minutes
- Category: Dessert
- Cuisine: American
Nutrition
- Serving Size: 1 truffle
- Calories: 110
- Sugar: 11
- Sodium: 60
- Fat: 6
- Saturated Fat: 3
- Carbohydrates: 13
- Protein: 1
Keywords: pumpkin cheesecake truffles, fall dessert, no bake, pumpkin spice, chocolate truffles, Thanksgiving treat, Halloween dessert, easy truffles, cream cheese, white chocolate, autumn recipe