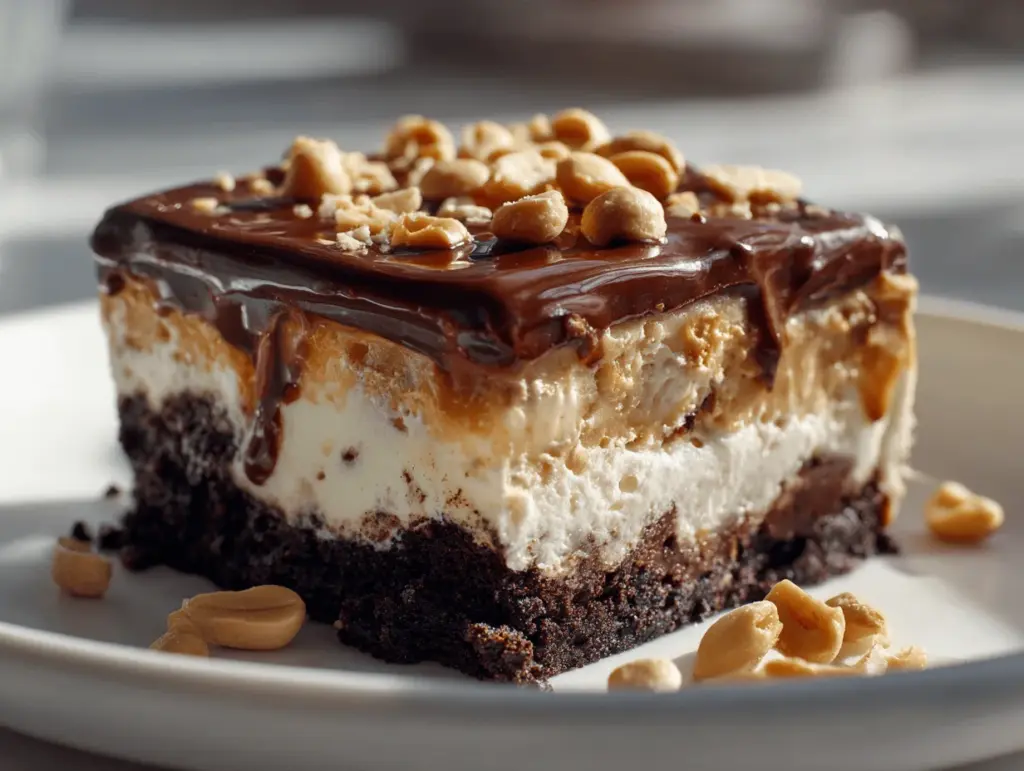
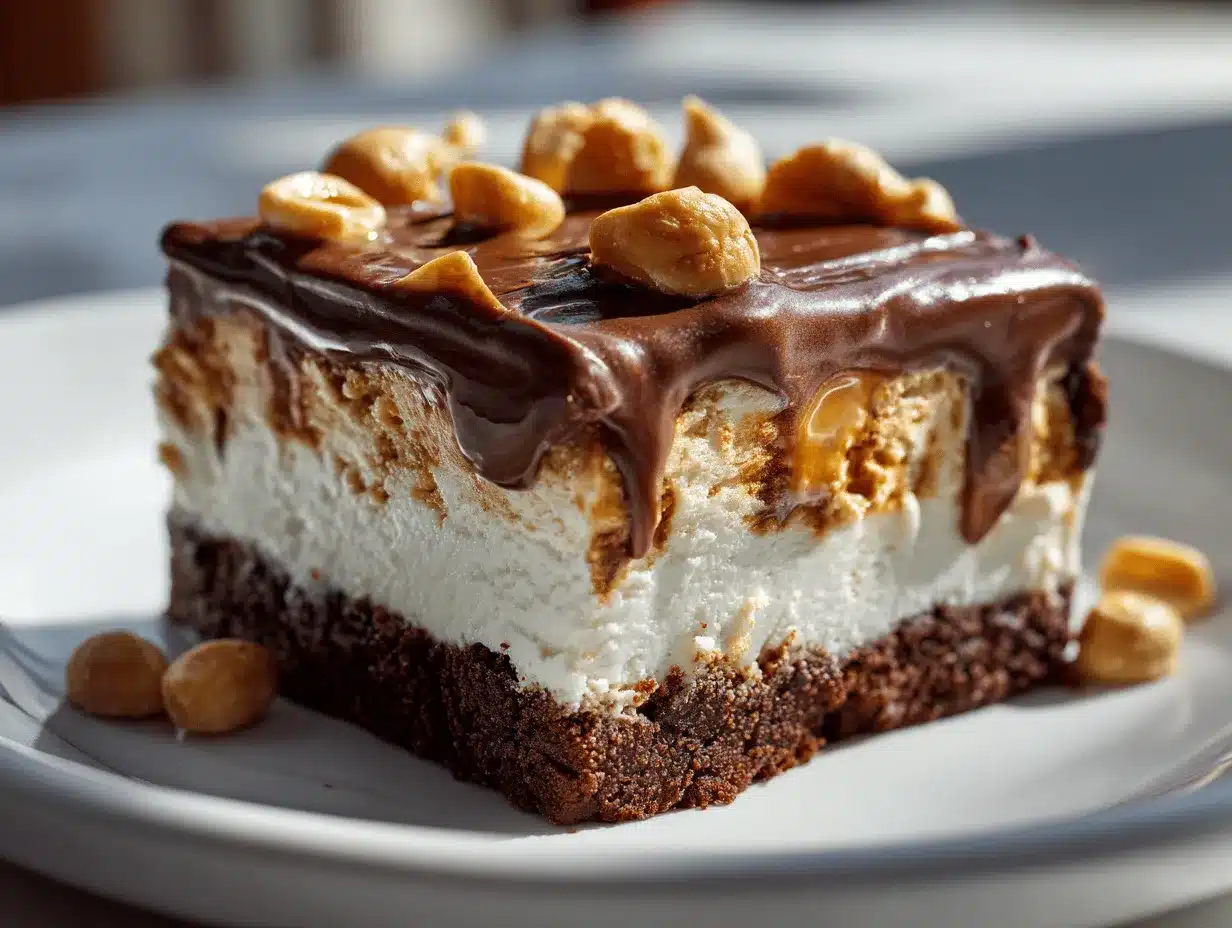
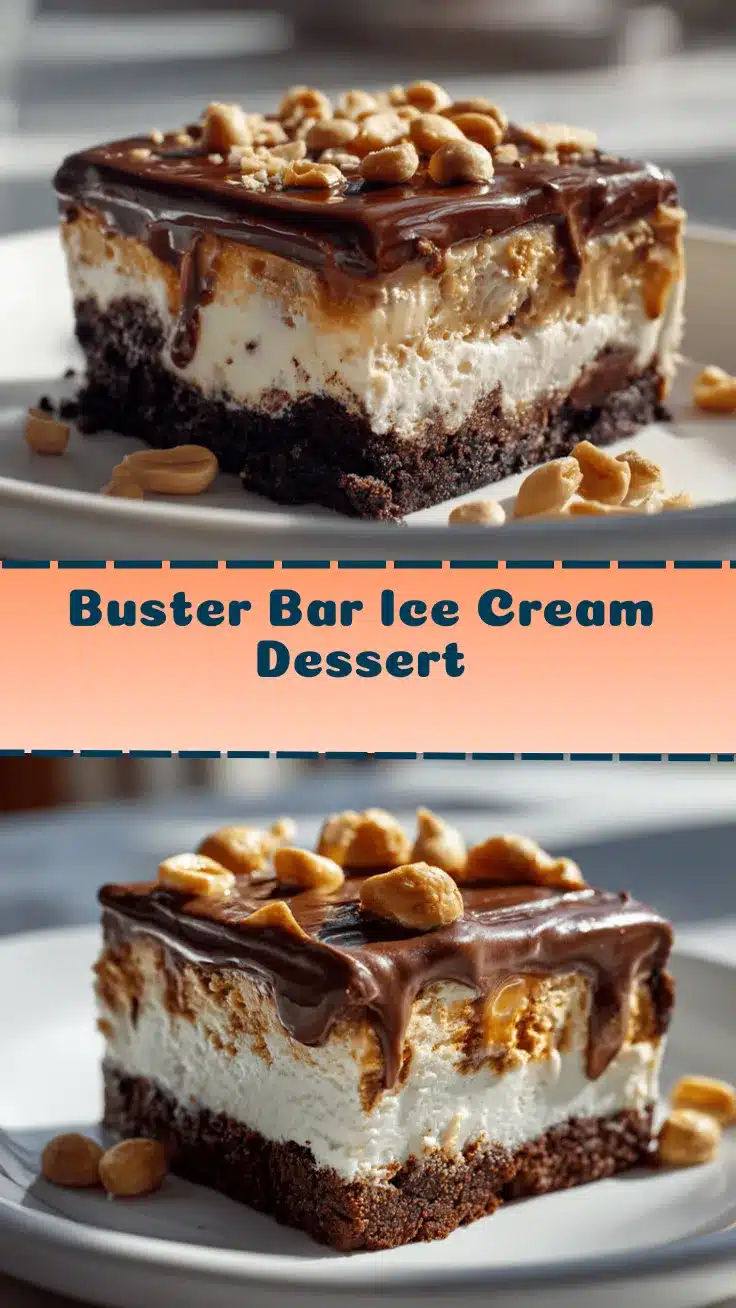
The first taste of a Buster Bar Ice Cream Dessert is pure summer magic—layers of creamy vanilla, rich fudge, crunchy peanuts, and that classic chocolate shell. You know, the kind of treat that instantly takes you back to the Dairy Queen drive-thru, sticky hands and big smiles all around. But here’s the secret: you can make your own Buster Bar Ice Cream Dessert at home, and honestly, it’s even better (plus, you get the biggest piece). I started making this recipe for family BBQs years ago, and it’s become the most-requested dish every summer. There’s just something about the cold, creamy layers and all that crunch that makes this the best ice cream dessert for hot days—or, let’s be real, any time you need a little pick-me-up.
This homemade Buster Bar Ice Cream Dessert isn’t just about nostalgia—it’s about flavor, fun, and sharing a treat that always draws a crowd. I’ve lost count of how many versions I’ve tried, from classic to creative (I even swapped in chocolate peanut butter ice cream once—game changer!). Whether you’re making it for birthdays, potlucks, or just as a surprise on a Tuesday night, everyone will be lining up for seconds. And the best part? It’s surprisingly easy to make, no fancy ice cream machine required. If you love anything chocolatey, nutty, and cold, this one’s for you. As an ice cream obsessive, I can promise: this Buster Bar Ice Cream Dessert delivers the goods every single time, and it’s about to be your new summer obsession.
Why You’ll Love This Buster Bar Ice Cream Dessert Recipe
- Quick & Easy: Comes together in about 20 minutes (not counting freeze time)—you barely need any kitchen experience! Perfect for those last-minute summer parties or when dessert cravings strike out of nowhere.
- Simple Ingredients: No need for a shopping spree. Most of the basics are probably already in your pantry or freezer.
- Perfect for Every Occasion: Whether you’re hosting a potluck, celebrating a birthday, or just want to chill on the patio, this dessert fits right in. It’s especially perfect for summer BBQs and holiday weekends.
- Crowd-Pleaser: Kids and adults go wild for it! I’ve never seen leftovers stick around for long—even the pickiest eaters can’t resist.
- Unbelievably Delicious: The creamy vanilla ice cream, crunchy peanuts, fudgy middle, and chocolate topping are a flavor combo that’s so satisfying. Every bite is cold, sweet, salty, and rich—like the best sundae you’ve ever had, in bar form.
I’ve tested dozens of variations, but this recipe nails that perfect balance: not too sweet, just the right amount of peanut crunch, and a fudge sauce that stays gooey even after freezing. Blending the ice cream a bit before layering makes it extra smooth, and using roasted, salted peanuts adds that classic salty-sweet finish. It’s not just a copycat Buster Bar—it’s the ultimate version, designed for home cooks who want reliable results every time. Let’s face it: there’s something a little magical about a dessert that gets ooohs and aaahs before anyone even takes a bite.
This Buster Bar Ice Cream Dessert isn’t just another ice cream cake. It’s the kind of treat you’ll crave all year, the one you’ll be proud to share, and the one your friends and family will beg you to make “just one more time.” Honestly, I keep the ingredients on hand all summer, just in case someone drops by. If you’ve been searching for a show-stopping cold treat that’s secretly simple to make, this is the one that’ll have everyone coming back for seconds.
What Ingredients You Will Need
This recipe uses simple, familiar ingredients that come together for a dessert that’s way more than the sum of its parts. Think classic ice cream sundae flavors—with a little extra crunch and a whole lot of nostalgia. Most of the items are pantry staples, so you can whip this up on a whim (which, trust me, will happen often!). Here’s what you’ll need:
- For the Crust:
- 24 chocolate sandwich cookies (like Oreos; you can use store-brand or gluten-free)
- 1/3 cup (75g) unsalted butter, melted
- For the Ice Cream Layer:
- 1.5 quarts (about 1.4L) vanilla ice cream, softened (try to use a good-quality brand for best flavor)
- For the Peanut Layer:
- 1 cup (150g) roasted, salted peanuts (roughly chopped for extra texture)
- For the Fudge Sauce:
- 1 cup (200g) granulated sugar
- 2/3 cup (160ml) evaporated milk
- 1/2 cup (115g) unsalted butter
- 2 cups (340g) semi-sweet chocolate chips (use milk chocolate if you prefer it a little sweeter)
- 1 tsp pure vanilla extract
- For the Chocolate Topping:
- 1 1/2 cups (260g) semi-sweet chocolate chips
- 1/4 cup (60g) coconut oil or vegetable shortening (helps the topping set with a nice crackle)
Substitutions and Tips:
- Swap in chocolate graham crackers or gluten-free cookies for the crust if needed.
- Use dairy-free ice cream and plant-based butter for a vegan version—just check labels for hidden dairy.
- Try almonds or cashews instead of peanuts if you have allergies (or leave them out entirely—still delicious!).
- Mix in a layer of caramel sauce between the peanuts and fudge for a fun twist.
Honestly, don’t stress if you need to swap a few things—this Buster Bar Ice Cream Dessert is super forgiving. The only thing I wouldn’t skip is that salty nut layer; it just makes the whole thing pop.
Equipment Needed
- 9×13-inch (23x33cm) Baking Dish: Glass or metal both work. I like glass so you can see the pretty layers!
- Food Processor or Rolling Pin: For crushing cookies. If you don’t have a food processor, put cookies in a zip-top bag and smash them with a rolling pin (honestly, kind of fun).
- Microwave-Safe Bowl or Saucepan: For melting butter and making the fudge sauce. Either works, but the stovetop gives you more control.
- Spatula or Offset Spreader: Helps with spreading the ice cream and fudge layers evenly.
- Mixing Bowls: At least two—one for the crust and one for the fudge sauce.
- Plastic Wrap or Aluminum Foil: For covering the dessert while it freezes.
- Sharp Knife: For cutting beautiful bars (run it under hot water for clean slices).
If you’re on a budget, don’t worry—no fancy gear is needed. I’ve made this with a glass Pyrex dish, a big spoon, and my trusty old saucepan. Just keep your tools clean between layers for the neatest finish. For specialty equipment like offset spatulas, a quick wipe with hot water keeps things smooth and tidy. If you use metal pans, line with parchment for easy removal (learned that one the hard way!).
How to Make Buster Bar Ice Cream Dessert
- Prep the Pan: Lightly grease a 9×13-inch (23x33cm) pan or line it with parchment paper, leaving some overhang for easy lifting later. Set aside. (This keeps things from sticking—trust me, you don’t want to wrestle with frozen dessert!)
- Make the Crust: Crush 24 chocolate sandwich cookies into fine crumbs using a food processor, or put them in a zip-top bag and bash with a rolling pin. Stir in 1/3 cup (75g) melted butter until well combined. Press the mixture firmly and evenly into the bottom of your prepared pan. Freeze for 10-15 minutes while you make the next layer.
- Layer the Ice Cream: Let 1.5 quarts (about 1.4L) vanilla ice cream sit at room temperature for 10 minutes, or microwave in 20-second bursts until just spreadable (not melted). Spread the softened ice cream evenly over the chilled crust, smoothing the top with a spatula. Pop the pan back in the freezer for at least 30 minutes, or until firm.
- Add the Peanuts: Sprinkle 1 cup (150g) roasted, salted peanuts over the ice cream layer. Press them in gently so they stick—don’t skip this step! Freeze again for 10-15 minutes (helps keep the layers neat).
- Make the Fudge Sauce: In a medium saucepan over medium heat, combine 1 cup (200g) sugar, 2/3 cup (160ml) evaporated milk, and 1/2 cup (115g) butter. Bring to a gentle simmer, whisking constantly. Once the mixture is bubbling, remove from heat and stir in 2 cups (340g) chocolate chips and 1 tsp vanilla. Stir until smooth and glossy. Let cool for 20-30 minutes, stirring occasionally, until just warm (if it’s too hot, it’ll melt the ice cream—been there, done that!).
- Spread Fudge Layer: Pour the cooled fudge sauce over the peanut layer. Gently spread to cover. Freeze for 45-60 minutes, or until very firm.
- Make the Chocolate Topping: Melt 1 1/2 cups (260g) chocolate chips with 1/4 cup (60g) coconut oil or shortening in a microwave-safe bowl (in 30-second bursts) or over a double boiler. Stir until smooth. Let cool slightly—should still be pourable, but not piping hot.
- Add the Final Layer: Pour the chocolate topping over the fudge layer. Gently tilt the pan to spread, or use a spatula. Freeze again for at least 2-3 hours, or overnight for best results.
- Serve: Before serving, let the dessert sit at room temperature for 10 minutes for easier slicing. Use a sharp knife dipped in hot water to cut into bars. Wipe the blade between cuts for those Instagram-worthy lines!
Troubleshooting Tips: If the fudge sauce is too thick, add a splash of evaporated milk. If the chocolate topping cracks too much, let it warm up a little before pouring. Layers looking messy? Don’t sweat it—once frozen, it’ll slice up beautifully. I’ve found that patience (and a little extra chill time) always pays off.
Cooking Tips & Techniques
- Soften Ice Cream Just Enough: You want it spreadable, not soupy. If it melts too much, the layers can get messy and refreeze with ice crystals. Keep an eye on it—10 minutes is usually just right.
- Cool Fudge Sauce Properly: This is a biggie. If the sauce is too hot, it’ll melt your ice cream and create a soupy mess. I learned this after rushing through my first attempt; patience is key! Let it reach warm room temp before spreading.
- Press Peanuts Gently: Don’t just sprinkle—lightly press the peanuts into the ice cream. Otherwise, they’ll float up when you pour on the fudge.
- Clean Knife Between Cuts: For perfect bars, run your knife under hot water and wipe it off between each slice. It makes a world of difference for presentation (especially if you’re sharing pics on Pinterest!).
- Use Quality Chocolate: Since chocolate is a main flavor, it’ll really show if you use good chips or a chocolate bar you love. Cheap chocolate sometimes won’t melt as smoothly.
- Freeze Between Layers: Don’t rush the freezing steps—it’s what keeps the layers neat and distinct. I know it’s tempting to speed things up, but trust me, it’s worth waiting for those gorgeous layers.
- Alternative Crusts: If you want to mix things up, try a pretzel crust for salty crunch, or chocolate graham crackers for a twist. Both work great, just adjust butter as needed so it holds together.
Timing is everything! I usually start this dessert a day ahead so each layer gets plenty of chill time. Multitasking helps—make the fudge sauce while the crust freezes, then soften ice cream while sauce cools. It makes the process more efficient, and you get a better finished dessert. Consistency is all about sticking to the steps and not skipping the freeze times (learned that one the hard way more than once!).
Variations & Adaptations
- Dietary-Friendly: Make it gluten-free by using gluten-free chocolate sandwich cookies. For a vegan or dairy-free version, use plant-based ice cream, vegan butter, and coconut milk in place of evaporated milk. Check your chocolate chips for hidden dairy.
- Seasonal Flavors: Swap vanilla ice cream for chocolate, coffee, or even peppermint in the winter. I love adding a swirl of caramel or raspberry preserves between layers for a fun surprise.
- Flavor Twists: Try different nuts (almonds, cashews, pecans) or add toffee bits for extra crunch. Use Nutella in the fudge sauce for a hazelnut kick—it’s a game changer!
- Different Cooking Methods: If you don’t have a big freezer, make individual portions in muffin tins—super cute for parties, and everyone gets their own mini Buster Bar treat.
- Allergen-Free: For nut allergies, skip the peanuts and add crushed pretzels or sunflower seeds for crunch.
My personal favorite? Swapping half the vanilla ice cream for chocolate peanut butter. The combo of salty nuts, rich fudge, and those two ice creams is next-level! Don’t be afraid to experiment—this recipe is super forgiving and always delicious.
Serving & Storage Suggestions
This Buster Bar Ice Cream Dessert is best served straight from the freezer, cut into generous bars. I like to let it sit out for about 10 minutes so the layers soften just a touch—that way, you get perfect slices, and the flavors really pop.
- Presentation: Serve on a chilled platter for best results. Garnish with extra peanuts or a drizzle of chocolate syrup if you’re feeling fancy.
- Pairings: Pairs perfectly with hot coffee, iced lattes, or a cold glass of milk. For a party, serve alongside fresh berries or a fruit salad to balance the richness.
- Storage: Cover tightly with plastic wrap or foil and store in the freezer for up to 2 weeks. Just make sure it’s well-wrapped to prevent freezer burn (nothing ruins a good dessert faster, trust me).
- Reheating: No reheating needed! Just let bars sit at room temp for a few minutes before serving.
- Flavor Over Time: The flavors meld and get even better after a day or two in the freezer—the fudge layer stays gooey, and the nuts stay crunchy.
Honestly, I often make a double batch and keep one stashed away for late-night summer cravings. It’s the treat that keeps on giving!
Nutritional Information & Benefits
This dessert is definitely a treat, but you can feel good about what’s inside. Each serving (about 1/15th of the pan) is estimated at 370 calories, with 6g protein, 23g fat, and 36g carbs. The peanuts add a little plant-based protein and healthy fats, while making the bars extra satisfying. Using real chocolate and ice cream means you know exactly what’s in your treat—no mystery ingredients here.
For those with dietary needs, you can make this gluten-free, nut-free, or dairy-free without losing that beloved Buster Bar flavor. Just be mindful of allergens—this dessert does contain nuts, dairy, and gluten unless you adapt it. Personally, I love knowing exactly what’s in my summer sweets, and a homemade Buster Bar Ice Cream Dessert means you get all the flavor, with none of the artificial stuff.
Conclusion
If you’re looking for a cold treat that’s nostalgic, easy, and downright irresistible, this Buster Bar Ice Cream Dessert is the answer. It’s the kind of recipe you’ll find yourself making again and again—for birthdays, BBQs, or just because you want to brighten someone’s day. I love how customizable it is, and how every layer brings a little extra joy to the table. Don’t be afraid to play around with flavors and toppings—make it your own!
Nothing makes me happier than seeing friends and family light up when they take that first bite. So go ahead, try this recipe, share it with your people, and let me know in the comments what twist you put on yours! Pin it, share it, and keep it in your summer dessert rotation. Here’s to many happy, ice-cream-filled memories—one slice at a time.
Frequently Asked Questions
How long does Buster Bar Ice Cream Dessert last in the freezer?
It’ll keep well for up to two weeks if tightly wrapped. Honestly, it rarely lasts that long in my house!
Can I make this dessert nut-free?
Yes! Just skip the peanuts or swap in sunflower seeds, pretzels, or even crushed cookies for crunch.
Is there a way to make it gluten-free?
Absolutely. Use your favorite gluten-free chocolate sandwich cookies for the crust, and double-check your ice cream and toppings for any hidden gluten sources.
Can I use a different type of ice cream?
Definitely! Chocolate, peanut butter, coffee, or even mint chip all work beautifully. Just make sure it’s a flavor you love.
What’s the best way to slice the dessert cleanly?
Run a sharp knife under hot water, wipe it off, and slice slowly. Clean between each cut for perfect bars every time—makes a big difference for presentation!
Pin This Recipe!
Buster Bar Ice Cream Dessert
- Total Time: 3 hours 30 minutes (includes freezing time)
- Yield: 15 servings 1x
Description
This easy homemade Buster Bar Ice Cream Dessert features layers of creamy vanilla ice cream, rich fudge, crunchy peanuts, and a classic chocolate shell. It’s a nostalgic, crowd-pleasing summer treat that’s perfect for BBQs, birthdays, or any occasion.
Ingredients
- 24 chocolate sandwich cookies (like Oreos; regular or gluten-free)
- 1/3 cup unsalted butter, melted
- 1.5 quarts vanilla ice cream, softened
- 1 cup roasted, salted peanuts, roughly chopped
- 1 cup granulated sugar
- 2/3 cup evaporated milk
- 1/2 cup unsalted butter
- 2 cups semi-sweet chocolate chips (for fudge sauce)
- 1 teaspoon pure vanilla extract
- 1 1/2 cups semi-sweet chocolate chips (for topping)
- 1/4 cup coconut oil or vegetable shortening
Instructions
- Lightly grease a 9×13-inch pan or line with parchment paper, leaving overhang for easy lifting. Set aside.
- Crush 24 chocolate sandwich cookies into fine crumbs using a food processor or by bashing in a zip-top bag. Stir in 1/3 cup melted butter until combined. Press mixture evenly into the bottom of the prepared pan. Freeze for 10-15 minutes.
- Let 1.5 quarts vanilla ice cream sit at room temperature for 10 minutes or microwave in 20-second bursts until spreadable. Spread softened ice cream evenly over the chilled crust. Freeze for at least 30 minutes, or until firm.
- Sprinkle 1 cup roasted, salted peanuts over the ice cream layer and press gently to adhere. Freeze again for 10-15 minutes.
- In a medium saucepan over medium heat, combine 1 cup sugar, 2/3 cup evaporated milk, and 1/2 cup butter. Bring to a gentle simmer, whisking constantly. Remove from heat and stir in 2 cups chocolate chips and 1 teaspoon vanilla extract until smooth. Let cool for 20-30 minutes until just warm.
- Pour cooled fudge sauce over the peanut layer and spread gently to cover. Freeze for 45-60 minutes, or until very firm.
- Melt 1 1/2 cups chocolate chips with 1/4 cup coconut oil or shortening in a microwave-safe bowl (30-second bursts) or over a double boiler. Stir until smooth. Let cool slightly until pourable but not hot.
- Pour chocolate topping over the fudge layer and tilt pan or use a spatula to spread evenly. Freeze for at least 2-3 hours, or overnight for best results.
- Before serving, let dessert sit at room temperature for 10 minutes. Use a sharp knife dipped in hot water to cut into bars, wiping the blade between cuts for clean slices.
Notes
For clean slices, run your knife under hot water and wipe between cuts. Let each layer freeze fully before adding the next for neat layers. You can substitute gluten-free cookies, dairy-free ice cream, or different nuts as needed. The dessert keeps well in the freezer for up to 2 weeks if tightly wrapped.
- Prep Time: 20 minutes
- Cook Time: 10 minutes
- Category: Dessert
- Cuisine: American
Nutrition
- Serving Size: 1/15th of pan (about 1 bar)
- Calories: 370
- Sugar: 27
- Sodium: 170
- Fat: 23
- Saturated Fat: 13
- Carbohydrates: 36
- Fiber: 3
- Protein: 6
Keywords: buster bar, ice cream dessert, summer treat, chocolate peanut dessert, homemade buster bar, frozen dessert, Dairy Queen copycat, easy ice cream cake