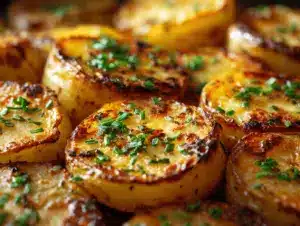
The crunch of a perfectly baked potato slice is pure music for a potato lover’s soul. Honestly, the first time I pulled a tray of these irresistible baked potato slices from the oven, the golden edges, whisper-crisp centers, and that waft of garlicky, herby aroma had me hooked—no dipping sauce needed! There’s just something about that combo of crispy outside and fluffy inside that feels so right, you know?
I stumbled on this baked potato slices recipe during a late-night snack craving. Chips felt too fussy, fries felt too greasy, so I grabbed a couple of potatoes and played around. After a few rounds (okay, more than a few), I landed on this oven-baked perfection: delightfully crispy, flavorful, and way easier than deep frying. It’s been a go-to for family movie nights, game day spreads, and even as a side for weeknight dinners. And, let’s face it, who doesn’t love a potato in nearly any form?
These crispy baked potato slices are a game-changer if you crave something snacky, crowd-pleasing, and just a little bit fancy without any fuss. They’re naturally gluten-free, and you can keep them simple or jazz them up with toppings. Whether you’re feeding picky kids or impressing friends at a casual get-together, this recipe delivers every time. Plus, you only need a handful of pantry staples and a hot oven—no special gadgets or obscure ingredients. As someone who’s made these more times than I can count, I promise: this is one of those recipes you’ll keep coming back to, and for good reason!
Why You’ll Love This Irresistible Baked Potato Slices Recipe
- Quick & Easy: You can have these crispy oven potato slices ready in under 40 minutes, start to finish. They’re perfect for spontaneous cravings or when you need a side dish in a pinch.
- Simple Ingredients: No need for a fancy grocery run. Regular russet or Yukon Gold potatoes, a splash of oil, and your favorite spices are all you need.
- Perfect for Any Occasion: These baked potato slices shine at brunch buffets, as a party appetizer, or even alongside your favorite burger or steak. They never look out of place—trust me, I’ve served them everywhere, from backyard barbecues to holiday dinners.
- Crowd-Pleaser: Kids gobble them up, adults ask for seconds, and even the pickiest eaters come back for more. There’s just something irresistible about that crispy bite!
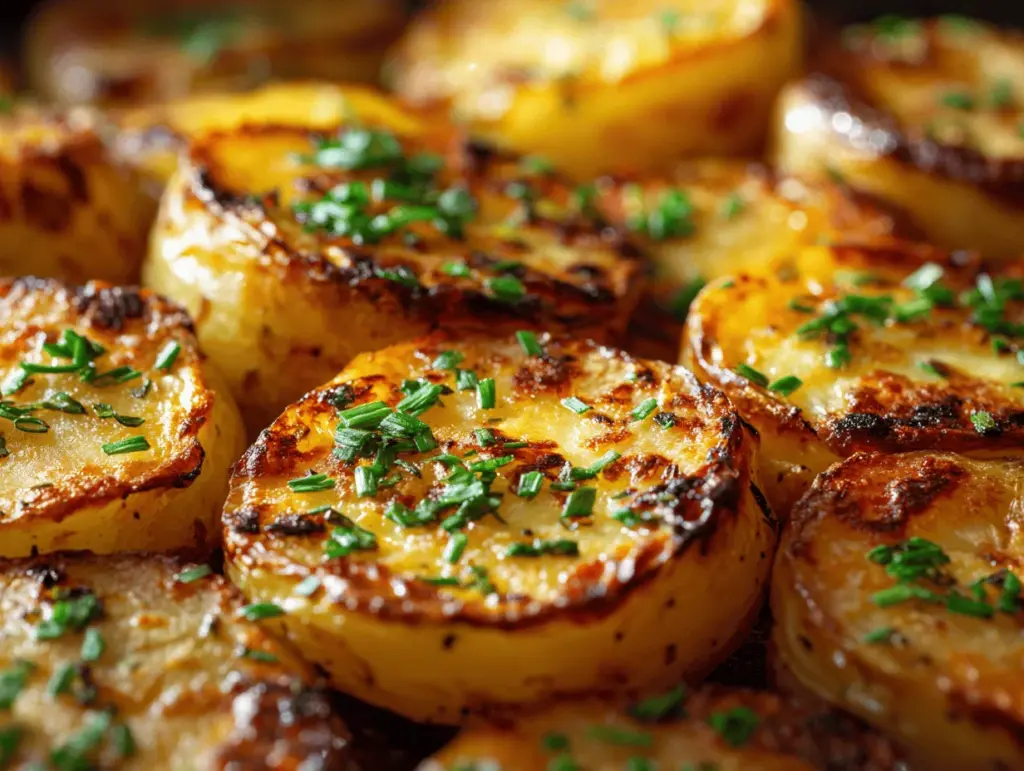
- Unbelievably Delicious: The contrast of golden, crispy edges and creamy centers makes every bite satisfying. Add a sprinkle of fresh herbs or a bit of melted cheese, and you’ve got snack magic.
What sets this baked potato slices recipe apart from the rest? I always slice my potatoes thin and soak them briefly in cold water—this little trick makes all the difference for maximum crispiness (learned that one the hard way after a few soggy batches). I also season every slice before baking, not after, so the flavors bake right in. There’s no need for flipping halfway through, either—the high temp and proper spacing do the job for you.
Truthfully, baked potato slices are more than just a side dish in my kitchen. They’re comfort food with a healthier twist and zero deep-frying mess. The kind of recipe you make when you want something both nostalgic and fresh. When you bite into one, it’s the sort of moment that makes you close your eyes for a second—pure potato bliss. If you want to impress without breaking a sweat, or just treat yourself to the best snacking experience, this is the recipe you need in your life.
What Ingredients You Will Need
This recipe uses humble ingredients to deliver that dreamy, crispy texture and bold flavor—no complicated shopping list required. You probably have most of these items in your pantry already, and there’s a lot of room for swapping things out if you need to. Here’s what you’ll need for the irresistible baked potato slices:
- Potatoes (russet or Yukon Gold, scrubbed and unpeeled, about 4 medium/700g) – Russets get super crispy, while Yukon Golds give a buttery flavor. You can use red potatoes in a pinch, but they’ll be a bit softer.
- Olive oil (3 tablespoons/45ml) – Helps crisp and flavor the slices. Avocado oil works great too, especially if you want a higher smoke point.
- Kosher salt (1 teaspoon/6g) – I use Diamond Crystal for its clean flavor. Sea salt or regular table salt are fine.
- Freshly ground black pepper (½ teaspoon/2g) – Adds a little bite.
- Garlic powder (1 teaspoon/3g) – For that extra savory punch. You can swap in onion powder or smoked paprika for a different vibe.
- Dried herbs (1 teaspoon/3g, like Italian seasoning, thyme, or rosemary) – My personal favorite is a mix of thyme and oregano, but you can use what you love or skip entirely for plain potato slices.
- Optional toppings:
- Fresh herbs (chives, parsley, dill – finely chopped, for sprinkling after baking)
- Grated Parmesan cheese (¼ cup/25g, for the last 5 minutes of baking)
- Red pepper flakes (for a little heat)
- Sour cream, Greek yogurt, or your favorite dip (for serving)
If you’re looking to go dairy-free, skip the cheese and stick to herbs. For a gluten-free version, you’re all set—these are naturally gluten-free! Want a little extra crunch? Add a dusting of cornmeal before baking. And if you’re out of olive oil, melted butter or coconut oil will give a different but equally delicious result.
One last tip—pick potatoes that are firm, without green spots or sprouts. If you want to go fancy, try adding a pinch of truffle salt or a drizzle of garlic-infused oil once they’re out of the oven. The possibilities are endless!
Equipment Needed
- Baking sheet (large, rimmed preferred) – A heavy-duty half-sheet pan works best for even browning. If you only have smaller pans, bake in batches.
- Parchment paper or silicone baking mat – This helps prevent sticking and makes cleanup a breeze. Aluminum foil is okay, but lightly grease it first.
- Sharp knife or mandoline slicer – Mandolines make perfectly even slices, but I’ve done this with just a chef’s knife when I’m feeling patient. Thinner slices = crispier potatoes.
- Mixing bowl – For tossing potato slices with oil and seasonings.
- Paper towels or clean kitchen towel – For drying the potato slices after soaking. Don’t skip this or you’ll risk sogginess!
- Spatula or tongs – For transferring slices to and from the baking sheet.
If you don’t have a mandoline, just try to slice your potatoes as thin and evenly as possible with a regular knife—no shame in a few uneven slices! For easy cleaning, I always line my baking sheet and wash it right after baking (baked-on potato bits can be stubborn if left to sit). Budget tip: You don’t need fancy tools—a sturdy pan and a sharp knife are all you really need.
How to Make Irresistible Baked Potato Slices

- Prep your oven and pan: Preheat your oven to 425°F (220°C). Line your baking sheet with parchment paper or a silicone baking mat for best results.
-
Slice the potatoes: Wash and scrub 4 medium potatoes (about 700g) well, leaving skins on for extra flavor and crunch. Slice them into ¼-inch (6mm) rounds. Use a mandoline for precision or a sharp knife for rustic charm.
Tip: Thinner slices get crispier. If some slices are thicker, they’ll be a little softer in the middle (not a bad thing!). -
Soak and dry: Place the potato slices in a bowl of cold water for 10-15 minutes. This step draws out some starch and helps achieve maximum crispiness.
Warning: Don’t skip the drying! Wet potatoes = steamed, floppy slices.
Drain and lay the slices on a clean kitchen towel or paper towels. Pat them completely dry. -
Season: In a large mixing bowl, toss the dry potato slices with 3 tablespoons (45ml) olive oil, 1 teaspoon (6g) kosher salt, ½ teaspoon (2g) black pepper, 1 teaspoon (3g) garlic powder, and 1 teaspoon (3g) dried herbs. Make sure every slice gets coated.
Tip: Use your hands for even coating—messy but worth it! -
Arrange on baking sheet: Lay the slices in a single layer on your prepared sheet. Make sure none are overlapping—they need space to crisp up.
If your pan isn’t big enough, bake in two batches. Crowding will make them steam instead of crisp. -
Bake: Place the sheet on the middle rack and bake for 25-30 minutes. No need to flip! After about 20 minutes, check for browning—some ovens run hot, so keep an eye out.
Sensory cue: The edges should look golden and feel crisp to the touch, while the centers stay tender. - Add optional toppings: For cheesy slices, sprinkle ¼ cup (25g) grated Parmesan over the potatoes during the last 5 minutes. Or add fresh herbs after baking for a pop of color and flavor.
-
Cool and serve: Let the slices cool for 2-3 minutes on the pan. This helps them crisp up even more.
Transfer to a platter and serve hot, with your favorite dip or just as they are.
If you find your slices sticking to the paper, let them cool a bit longer before lifting. And if you’re baking in batches, keep the first batch warm in a low oven (around 200°F/95°C) while you finish the rest. The whole process is pretty forgiving—just keep an eye on them after the 20-minute mark so they don’t go from golden to charred!
Cooking Tips & Techniques for Perfect Baked Potato Slices
Here’s where you can really make your baked potato slices shine. After many, many trays of potatoes (and a few burnt casualties), I’ve learned a few tricks!
- Soaking is a must: Skipping the cold water soak leads to limp slices. This step pulls out starch, so you get that beautiful crunch.
- Dry thoroughly: If there’s any moisture left, the slices will steam. I sometimes spin them in a salad spinner—sounds weird, but it works!
- Spacing matters: Overlapping slices will never crisp up. Give every slice its own little “parking spot” on the baking sheet.
- Oil evenness: If you see dry spots, drizzle a teeny bit more oil or rub the slices with your fingers. Too much oil, though, and you’ll get greasy potatoes.
- Watch your oven: Every oven is a little different. If your slices are browning too quickly, lower the temp by 15°F (about 10°C). If they’re pale after 30 minutes, turn on the broiler for 1-2 minutes (but don’t walk away!).
- Batch baking: If you’re making a double batch, rotate the pans and swap racks halfway through for even color.
- Consistency is key: Try to keep your slices as even as possible for even baking. If some are thick and some are thin, just expect a range of textures (which can actually be fun for snacking!).
One time, I got distracted and forgot to dry my slices—let’s just say I ended up with something closer to roasted mashed potatoes than chips! Learn from my mistakes: dry, space, and keep an eye on the oven. These little tweaks make all the difference for that oven perfection.
Variations & Adaptations
There are so many ways to make this baked potato slices recipe your own. Whether you’re aiming for a specific diet, want to change up the flavors, or need to work with what you’ve got, here are my favorite twists:
- Cheesy Loaded Slices: Top with shredded cheddar and crumbled bacon for the last 5 minutes of baking. Add a dollop of sour cream and chives after they come out. It’s like a loaded baked potato in every bite!
- Spicy Southwest: Swap Italian herbs for chili powder and cumin. Serve with salsa and guacamole for dipping. If you’re feeling bold, a sprinkle of smoked paprika adds amazing depth.
- Herbivore’s Dream: Use fresh rosemary, thyme, and parsley. Finish with a squeeze of lemon juice and a dusting of flaky sea salt. This light and bright version works especially well in spring and summer.
- Dietary Adaptations: For vegan, skip cheese and use olive oil. For paleo, use coconut oil and add a dusting of nutritional yeast for a cheesy flavor. Gluten-free? You’re already good to go.
- Cooking Methods: Try air frying for an even crispier bite (about 15-18 minutes at 400°F/200°C, shaking halfway). Or, grill the slices on a well-oiled grill pan for a smoky flavor.
- Personal Favorite: Sometimes I add a sprinkle of za’atar or curry powder for a totally different flavor profile—unexpected but truly delicious!
If allergies are a concern, skip dairy toppings and always check your seasoning blends for hidden gluten or additives. The beauty of this recipe is how adaptable it is—just follow the basic method and let your creativity (and pantry) lead the way.
Serving & Storage Suggestions
These baked potato slices are best served piping hot, fresh from the oven—the crunch is at its peak! Pile them on a rustic platter, sprinkle with fresh herbs, and watch them disappear.
- Serving ideas: Pair with burgers, steak, grilled chicken, or even eggs for brunch. They’re also awesome alongside a big salad or as a base for nacho-style toppings.
- Dipping options: Serve with ketchup, ranch, garlic aioli, or even spicy sriracha mayo. Whatever your dipping style, there’s no wrong answer.
- Storage: Leftovers (if you have any!) can be stored in an airtight container in the refrigerator for up to 3 days.
- Reheating: Re-crisp in a 400°F (200°C) oven for 8-10 minutes. The microwave works but will soften them. An air fryer is also a great option for bringing back the crunch.
- Flavor development: Honestly, these are at their best right after baking, but if you do store them, the flavors tend to deepen as they sit—especially if you used herbs or spices. Just don’t expect quite the same crunch as day one.
Nutritional Information & Benefits
A regular serving (about 1 medium potato’s worth/175g) of baked potato slices contains roughly:
- Calories: 180
- Fat: 7g
- Carbohydrates: 27g
- Fiber: 3g
- Protein: 3g
- Sodium: 250mg (will vary by salt and toppings)
These oven-baked potato slices are gluten-free, vegetarian, and can be made vegan with a simple topping swap. Potatoes are a solid source of vitamin C, potassium, and fiber (especially with the skin on). Olive oil adds heart-healthy fats, and if you go easy on the salt, they’re a smart alternative to fried snacks. If you have a nightshade allergy, though, potatoes are a no-go.
Personally, I love knowing I can indulge in that crispy snack craving without all the grease of chips or fries. It’s a little bit wholesome, a whole lot satisfying!
Conclusion
If you’re craving something crispy, comforting, and just plain fun to eat, these irresistible baked potato slices are a must-make. They’re easy enough for a quick snack, impressive enough for a party, and flexible enough to fit almost any dietary need or flavor craving. That’s why they’ve become a regular in my kitchen—and I bet they’ll be on repeat in yours, too!
Don’t be afraid to make this recipe your own—switch up the seasonings, add your favorite toppings, or even play with different dipping sauces. The foundation is simple, but the possibilities really are endless. I love how a humble potato can turn into something so crave-worthy with just a few tweaks and a hot oven.
Give these baked potato slices a try and let me know what you think! Drop your own twists or topping ideas in the comments, pin this recipe for later, or share with a fellow potato fan. Happy snacking, and here’s to golden, crispy perfection every time!
Frequently Asked Questions
How thin should I slice the potatoes for baked potato slices?
Aim for about ¼-inch (6mm) thick slices. Thinner slices get crispier, while thicker ones stay more tender. Try to keep them as even as possible for uniform baking.
Can I make baked potato slices ahead of time?
You can prep the potatoes and even season them in advance, but they’re crispiest right after baking. If you need to make them ahead, reheat in a hot oven or air fryer to revive the crunch.
What are the best types of potatoes for this recipe?
Russet potatoes get the crispiest, while Yukon Golds are buttery and flavorful. Red potatoes work but will give a softer result. Choose firm, unblemished potatoes for best texture.
Can I make this recipe without oil?
You can use a nonstick spray or just a light brushing of oil, but skipping oil entirely will lead to drier, less flavorful slices. For the crispiest results, a bit of oil is key.
Are baked potato slices gluten-free?
Yes! This recipe uses only potatoes, oil, and seasonings—no gluten in sight. Just double-check any spice blends or toppings if you’re cooking for someone with celiac disease.
Pin This Recipe!
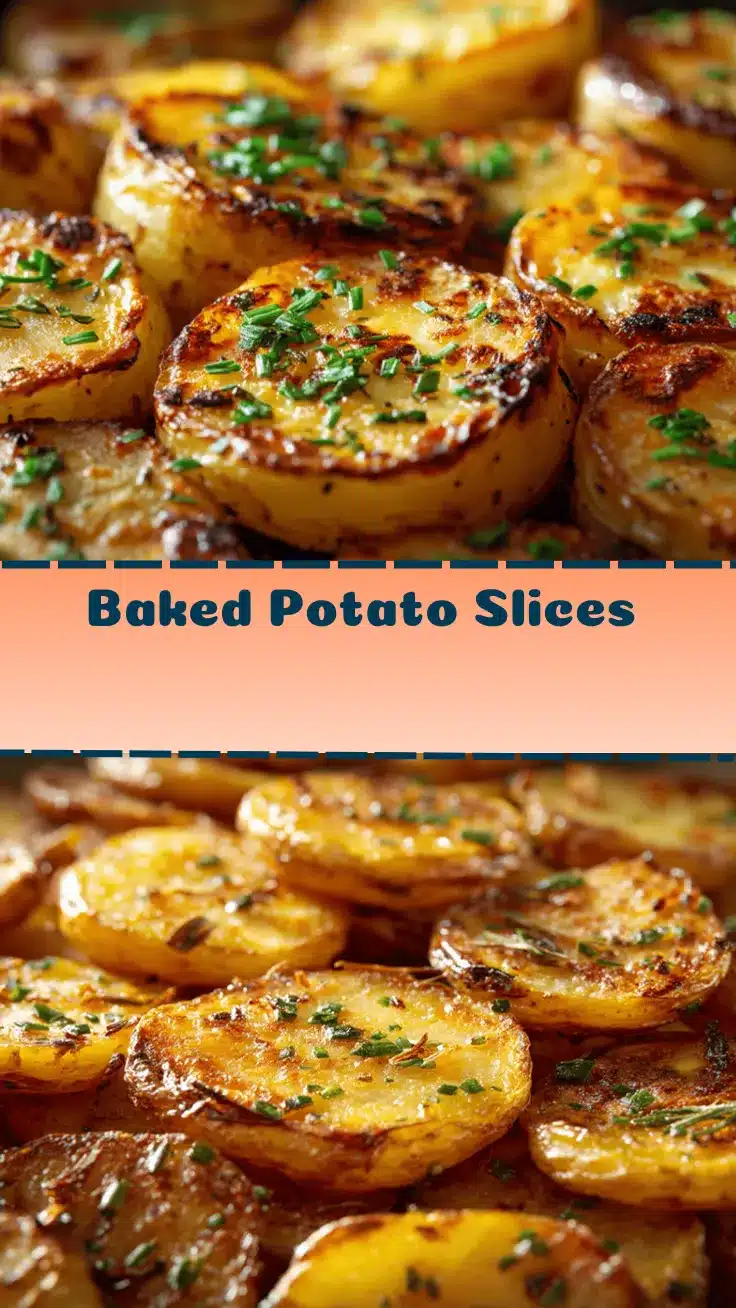

Baked Potato Slices Recipe – Easy Crispy Oven Perfection
- Total Time: 40-45 minutes
- Yield: 4 servings 1x
Description
These oven-baked potato slices are irresistibly crispy on the outside and fluffy inside, making them a perfect snack, appetizer, or side dish. With simple pantry ingredients and no deep frying, they’re naturally gluten-free, crowd-pleasing, and endlessly adaptable.
Ingredients
- 4 medium russet or Yukon Gold potatoes (about 1.5 lbs/700g), scrubbed and unpeeled
- 3 tablespoons olive oil (or avocado oil)
- 1 teaspoon kosher salt
- 1/2 teaspoon freshly ground black pepper
- 1 teaspoon garlic powder
- 1 teaspoon dried herbs (such as Italian seasoning, thyme, or rosemary)
- Optional: fresh herbs (chives, parsley, dill), finely chopped, for sprinkling after baking
- Optional: 1/4 cup grated Parmesan cheese (for last 5 minutes of baking)
- Optional: red pepper flakes (for heat)
- Optional: sour cream, Greek yogurt, or your favorite dip (for serving)
Instructions
- Preheat your oven to 425°F (220°C). Line a large rimmed baking sheet with parchment paper or a silicone baking mat.
- Wash and scrub the potatoes well, leaving skins on. Slice into 1/4-inch (6mm) rounds using a mandoline or sharp knife.
- Place potato slices in a bowl of cold water and soak for 10-15 minutes to remove excess starch.
- Drain and lay the slices on a clean kitchen towel or paper towels. Pat completely dry.
- In a large mixing bowl, toss the dry potato slices with olive oil, salt, black pepper, garlic powder, and dried herbs until evenly coated.
- Arrange the slices in a single layer on the prepared baking sheet, making sure none are overlapping. Bake in batches if needed.
- Bake on the middle rack for 25-30 minutes. No need to flip. After 20 minutes, check for browning; edges should be golden and crisp, centers tender.
- If using Parmesan, sprinkle over the slices during the last 5 minutes of baking. Add fresh herbs after baking if desired.
- Let the slices cool for 2-3 minutes on the pan to crisp up further. Transfer to a platter and serve hot with your favorite dip or as is.
Notes
For extra crispiness, soak potato slices in cold water and dry thoroughly before baking. Space slices out on the baking sheet to avoid steaming. Add toppings like cheese or fresh herbs for variety. Store leftovers in an airtight container for up to 3 days and reheat in a hot oven or air fryer to restore crunch.
- Prep Time: 15 minutes
- Cook Time: 25-30 minutes
- Category: Appetizer
- Cuisine: American
Nutrition
- Serving Size: About 1 medium potato's worth (175g) per serving
- Calories: 180
- Sugar: 1
- Sodium: 250
- Fat: 7
- Saturated Fat: 1
- Carbohydrates: 27
- Fiber: 3
- Protein: 3
Keywords: baked potato slices, crispy potato slices, oven baked potatoes, gluten-free snack, easy potato appetizer, healthy potato recipe, vegetarian, party snack, potato side dish